Fashion
A Comprehensive Guide To The Different Types Of Braids
Remember the days when you wore an old three-strand braid at school! Now everyone has a unique version of the braid! From French braids to braids, if you are confused by the many types of braids, let’s simplify it for you. It can be a wedding or a business meeting, a visit to the gym or a date, you will find a braid for every situation. Braids are a protective hairstyle that protects the hair from damage. Even on days when you haven’t washed your hair but suddenly have nowhere to go, braids can save your life. And you can combine it with literally any other hairstyle – ponytails, hairstyles, twists and loose hair. Not to mention, there’s a braid for every mood – messy, tidy and everything in between. Tubes are so versatile! Here is a complete guide to the different types of braids and how to try them out to help you navigate this great world of braids! Read on to find out more!
In This Article
- Various braids
- Frequent questions
- Various braids
Simple 3 strand braid
The simplest braid, the simple 3 strand braid, is a hairstyle that each of us grew up with. It is also probably the first haircut you have learned to do on your own. These simple braids can be used to create an infinite number of hairstyles by playing with their size and textures.
What do you need
- Hairbrush
- hair tie
How to model
- Brush off all tangles and tangles from your hair.
- Divide your hair into 3 equal sections.
- Fold the left part over the middle part.
- Now fold the right part over the middle part (which was the left part).
- Keep repeating steps 3 and 4, alternately wrapping the left and right hair sections over the middle section until you’re done braiding.
- Secure the tips with a hair elastic.
French braid
Now here’s another classic braid that is a classic style all over the world. A French braid is the simplest and most elegant way to keep hair off your face on a hot summer day. It is also the perfect hairstyle for work or school. French braiding can take some practice to master, but once you get the hang of it, it takes less than 3 minutes.
What do you need
- Hairbrush
- hair tie
How to model
- Brush off all branches from the hair.
- Lift the front part of the hair (between the points) and divide it into three sections.
- Just slip it in one place.
- After the second stitch, add a 2-inch strand of hair from the outside of the braid to each side strand before twisting it onto the center strand of the braid.
- When the French braid reaches your neck and you finish the hair to be added, braid the rest all the way through and secure the ends with a hair elastic.
- You can part the braid and loosen it to make it look more voluminous.


Fishtail braid
Perhaps the most complex braid, the fishtail braid is a favorite when it comes to hairstyles for extravagant occasions. This trendy braid subtly weaves thin sections of hair to create a symmetrical effect that looks like perfectly aligned scales on top of a fish’s tail.
What do you need
- Hairbrush
- 2 hair ties
How to model
- Detangle your hair with a brush.
- Gather all your hair and tie it into a ponytail.
- Divide the ponytail into 2 equal parts.
- Take a thin strand of hair from the outside of the left section, flip it over and add it to the inside of the right section of your ponytail.
- Now take a thin strand of hair from the outside of the right section, flip it over and add it to the inside of the left section of your ponytail.
- Repeat steps 4 and 5 alternately until the fishtail is woven into your hair.
- Secure the tips with a hair elastic.
- Clip a hair band across the top of the braid to complete the look.
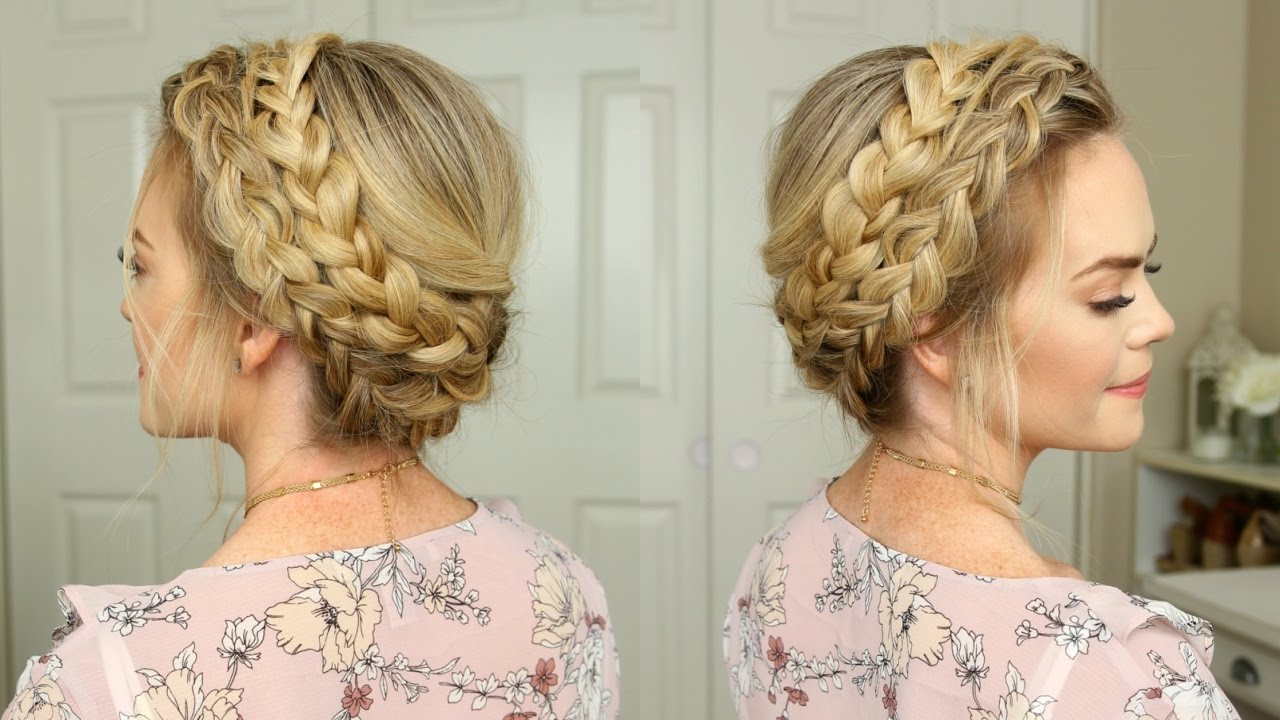
Dutch Braid
A Dutch braid is nothing more than a French braid in reverse. This braided look has a wide reach as it sits on top of your hair. A Dutch braid can be paired with a half-up style for a flirty vibe, or paired with a chignon for great function.
What do you need
- Hairbrush
- A hair tie
How to shape?
- Brush all tangles and tangles out of your hair.
- Gather the front section of hair between the temples and divide it into 3 sections.
- Drop it to sew by turning the side pieces under the center piece.
- At each point of the braid, start adding hair from the outside of the braid to the sides before twisting it under the center section.
- Once the dutch braid reaches the nape, simply thread in the rest of the length and secure the ends with a hair elastic.
Strand Braid
A 4-strand braid is a fun way to shake things up when you’re tired of the same old 3-strand braid. This beautifully twisted braid is a cute hairstyle that you can show off in class. The best thing about a 4 strand braid is that it looks like a regular braid at first glance, but then it makes people a double take!
What do you need
- Hairbrush
- A hair tie
How to shape?
- Brush your hair to remove all tangles and tangles.
- Divide it in half or brush it all the way back.
- Divide your hair into 4 equal parts and number them 1, 2, 3 and 4 on your head.
- Now start weaving them by turning section 1 under section 2 and above section 3.
- Then turn 4 over section 3 and under 4.
- Now renumber the sections 1, 2, 3, 4 at the end and repeat the pattern from top to bottom until you’ve weaved all the way through.
- Tie the ends with a hair tie.
Braided Rope Braid
When it comes to braiding, it doesn’t get any easier than a twisted rope braid. Since it’s just a matter of twisting two sections of hair together, it takes about 2 minutes to complete this adorable braid. A rope braid is perfect for showing off on days when you’re running late and need to get out the door right away.
What do you need
- Hairbrush
- 2 hair bows
How to shape?
- Brush out all the tangles and tangles in your hair and tie it into a high ponytail.
- Divide your ponytail into 2 parts.
- Twist the two parts clockwise to the ends one by one.
- Weave these twisted sections together counterclockwise until the end.
- Secure the ends with a hair tie.
Pull through the braid
All fine-haired ladies, listen up. Here is a great braid that will make your hair very voluminous. A pull through braid is a very trendy braid that consists of tying hair together in a ponytail and pulling it together to create a braided effect.
What do you need
- Hairbrush
- hair loops
How to shape?
- Brush your hair to remove all tangles and tangles.
- Gather a hair band from the top of your head and tie it into a ponytail.
- Gather the second lock of hair directly under the first ponytail and tie it to the second ponytail.
- Divide the first ponytail in half.
- Connect the two parts of the first ponytail under the first ponytail (so that the second ponytail is in between) and tie it with a hair tie.
- Now gather hair and tie the third ponytail under the second.
- Divide the second ponytail in half, tie the ends under the third ponytail and tie it with a hair elastic.
- Repeat this process until you have completed the tying hair for the extra ponytails.
- At this point there are 2 loose ponytails in the neck.
- Make a final braid stitch with it to complete the look.
Reverse Braid
The inverted braid is exactly what the name suggests. This fun braid starts at the nape and goes up to the head, giving your bun a gorgeous look. It can also be worn under a ponytail and is perfect for workout and sports training.
What do you need
- Hairbrush
- A hair tie
- hairpins
How to shape?
- Brush all tangles and tangles out of your hair.
- Tilt your head forward and unfold all your hair in front of you.
- Gather the hair from the nape of the neck and divide it into 3 sections.
- Start Dutch braiding by twisting the side sections under the center section and adding more hair to the braid with each subsequent stitch.
- Once the Dutch braid has reached the top of the head, tie all your hair into a ponytail.


